
I have joined forces with Illuminated Cuing Arts (ICA). Robin Dreyer is a content provider for the system and is one of of the best instructors in the country. ICA makes and sells a system that is perfect for practicing. An overhead projector shines lights down on the table showing the exact location of the balls, position routes, cut angles, target zones, and more. I have thought of doing this forever, and thankfully they have. Parts of 3 of my books have been converted into 4 modules. You can think of their system as your smartphone and the modules as apps.
CAPELLE’S ICA PRACTICE MODULES
|
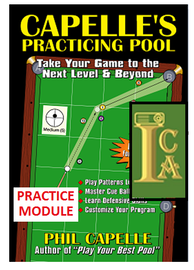
CAPELLE’S PRACTICING POOL
MODULE This module contains over 130 exercises taken from my book, Capelle’s Practicing Pool. The module, which is intended to accompany the book, helps you quickly and accurately set up each position. The module can work fine for many of the exercises, but for some you really should use the book and the module together. To view the ICA system and to order this module, go to: https://www.icatraining.com/ |
Ch. 2 - Fast Start
PAGE
35 Shooting at the Donut
36 Feeling Your Speed of Stroke
Ch. 3 - Fundamentals First
49 When to Get Up and Start Over
Ch. 4 - Shotmaking and Aiming
83 Both Sides of Identical Shots
87 Down the Rail Shots
88 Thin Cuts Down the Rail
89 Full to Thin Rail Shots (Lights are a big help) (LBH)
90 The Limbo
91 Long Distance Down the Rail
SHOTMAKING SECTION
95 Short Distance – The Foundation Shots
96a Lower off Rail
96b Off End Rail
97a Lower Middle
97b 1.5 Lower
98a Upper Off Rail
98b Middle 1 Diamond
99a Upper 1 Diamond
99b The Head Spot
100a 2.5 Upper
100b Upper Middle
101 Secondary Shots
102a The Long Middle
102b Six Diamonds
103a Across the Table
103b Down the Table
105 Side Pocket Shotmaking
106 Side Pocket Shot Pictures
107 Corner Pockets on the Short Side
108 Side Pockets on the Short Side
110 Straight in the Side – Part A
112 Yes – Maybe – No
116 Typical Short Rail Bank Shots
117 Spinning In Bank Shots
118 Typical Long Rail Bank Shots
119 Crossover Bank Shots
120 In the Moment
122a Tough Shots #1
122b Tough Shots #2
124 Bread and Butter Rail Shots
125 Table Length Rail Shots
126 Jacking Up
127 The Distractors
128 Zen Master Distraction Shots
Ch. 4 - Position Play
131 Soft Follow Shots
132 The Stop Shot
133 Slight Angle Stop Shots
134 The Draw Shot
135a Adding Some Speed to a Draw Shot
135b In Introduction to Angled Draw Shots
136 The Beauty of Cut Angles (need book)
137 Rail Shots
138 The Discovery Shot
139 The Half Diamond Shot
140 In and Out
141 The Angle of Departure
143a The Dead Scratch
143b Stun Shots
144 The Bend
147 The Truth About Outside English
148a The Escape Shot
148b Frozen Shots with English
149a The Magic of Quality Spin and a Softer Stroke
149b The Overlooked Horizontal Axis
151 The 3 Components
152 The Primary Emphasis (book helps)
157 Multi Rail Mastery
158 The Classic Two Railer
159a Inside English Two Railer
159b Across the Table
160 Across and Down the Table
161 Side Pocket 3-Railer
162 Speed Control
164a Mid-Range Follow Shots
164b Mid-Range Draw Shots
165a Across the Table Draw Shots
165b Draw/Stun Shots
166 Soft Strokes at Pocket Speed
167a Thin Cut Pocket Hangers
167b Short Draw Shots
168 Power Stun Workout
169a Power Follow Shots
169b The Power Draw
171 Gaps in the Real World (need book)
172 Zig Zag Revisited
173a Zig Zag Rotation
173b The Special “L”
174 Side Pocket Circle
175a Ultra Fine Target Ball
175b Pro Target Ball
Ch. 5 - Pattern Play
178 Nine-Ball Endgame Layouts
184 Balls in the Middle
185 Doing the Cosmo
192 Nine-Ball Patterns within a Pattern (1)
193a Nine-Ball Patterns within a Pattern (2)
193b Nine-Ball Patterns within a Pattern (3)
194 Vertical Axis Only – A
195 Vertical Axis Only – B
197 The James Bond Mission (need book)
198 Side Pockets Forbidden
Ch. 7 - Safety Play
200 The 5 Basic Hits
201a Follow the Pathway
201b Off the Rail and into Jail
202 Spin to Win
203 Tangent Line Safeties
204 Angle of Departure
205 Planning the Perfect Safety
206a Bull’s Eye
206b Position Routes for a Safety
207 Long Distance Safety Routes
208 Skimming the Cream
209 Thin Hit Diversion
210 Object Ball Distance Control
211 Moving the Chess Pieces
212 Multiple Objectives
213 Controlling Both Balls
214 Both Balls
215 Finesse Safeties
216 Split the Atom
Ch. 8 - Kicking
218 Basics of Kicking
220 Short Rail Mastery
221 The Treadmill
222 The Gaps
223a The Corner Pocket Gap
223b Stick and Hook
224 Kick to Make
225 Makeable Kick Shots
226 Long Railers
227 Real World Kick Shots
PLAY YOUR BEST 9 & 10 BALL
|
POSITION ROUTES
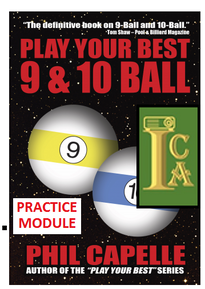
The name of each runout is followed by its difficulty rating. C is routine, B is above average, and A is super challenging. Many diagrams have more than one shot, so on these you will find multiple ratings. The page on which it can be found in my book, Play Your Best 9 & 10 Ball, comes last. RR stands for Recovery Route – these are typically routes you end up playing when you miss shape. To view the ICA system and to order this module, go to: https://www.icatraining.com/ |
No-Rail Position Routes
Stop Shots (C-3) 70
Soft Follow Shots (C-3) 70
Power Floaters (A-2) 71
Follow Stun (B-A) 72
Basic Short Range Draw Shots (C-3) 72
Long Draw Shots (A & B) 73
The Return Path on Draw Shots (B-3) 74
Draw Floater (B-4) 74
Stun/Draw (B-3) 75
TOTAL ROUTES 25
One-Rail Position Routes
Basic Follow Routes (C-3) 76
Balls Near a Pocket (C-3) 77
Pocket Speed Position, Lag Shot (B, B, C, B) 78
One-Rail Follow on a 30-Degree Cut (B-4) 79
Inside Eng. & the 90-Degree Ref. Line (B-2) 80
How the Angle Naturally Widens (B) 80
Long Distance One Rail Follow (B-2) 81
Targeting the Contact Point (B-2) 81
Long Distance Finesse Stun/Follow (A-2) 82
Basic Side Pocket One-Railers (C-2) 82
Creeper Follow (B) 83
Inside Power Follow (A) 83
One-Rail and Out (C, C, A) 84
Draw Across Table and Out (B-3) 84
Backcut Draw Across Table & Out (B-3) 85
Draw to the Rail and Out (B-2) 85
Draw Up the Side Rail (C-2) 86
Finesse Draw Outside English (B-2) 86
Draw Kill Shot (A) & (B) 87
Side Pocket to the End Rail (C-2) 87
The Pound Shot (A-4) – RR 88
Super Hard Pound & Draw (A-2) 88
Creating an Angle (B-2) RR 89
TOTAL ROUTES 54
Two-Rail Position Routes
Two Rails with Follow (C-2) 90
Cueing & Speed Affects Follow Route (B-3) 90
Two Rails with Inside Follow (B-3) 91
Shallow Angle Two-Railer (B, B, A) RR 92
Small Cut Angle Two-Railer (A, A, B) RR 92
Crossing the Table with Eng. (B-2) 93
Long Dist. Side Rail Follow Shots (A-3) RR 94
Avoiding a Common Scratch (C-3) 94A
Natural Centerball Two Railer (A) 95
Going Deep into the Corners (A) 95
Reversing with Outside Eng. (A) 96
Across & Down, Inside English (A) 96
Two Rails with Draw (C-2, B-2) 97
Stun/Draw Two Railer (B-3) 98
Two Rails Across with Draw Outside (B-2) 98
Stun Across and Down the Table (B-3) 99
Basic Side Pocket Two-Railer (B-2) 100
Side Pocket Inside Eng. Two-Railers (B-2) 100
Inside Draw Two Rails (A) 101
TOTAL ROUTES 44
Three Rail Position Routes
Power Three-Railer (B, A) 102
Off Side Rail Three-Railer (B) 103
Three Rails Across (A) 103
Three Rails After a Thin Cut (A) 104
Power Three Rail Position (A) 104
Side Pocket Three-Railer (C, B) 105
Inside English Side Rail Three-Railer (A) 105
Inside English Three-Railer (B) 106
Inside Draw off the Side Rail (A) 106
Cross Table Twice (A) 107
Massive Three Rail Draw (A) 107
TOTAL ROUTES 13
Four-Rail Position Routes
Draw Four-Railer (A) 108
Four Rails to the Short Side (A) 108
Inside English Four Rails to Short Side (A) 109
Four Rails with Inside Spin (A) 110
Long Distance Four-Railer (A) 110
Follow/Pound Around Table (A) 111
Thin Cut Four Rail Route (A) 111
TOTAL ROUTES 7
Position off of Bank Shots
Cross Corner Bank Routes (B-8, 3 diag.) 113
Long Rail Bank Routes (A-2) 113
Crossover Side Pocket Bank (B) 114
Intentionally Banking for Shape (A) 114
Around the Table Bank Shape (A) 115
Draw to Rail & Out (A) 115
Draw for Shape off End Rail (B) 116
Bank and Go Three Rails (A) 116
TOTAL ROUTES 16
GRAND TOTAL 159
|
PLAY YOUR BEST
9 & 10 BALL 
|
MODULE:
CLOSING RUNOUTS & BIG FIRST SHOTS DERBY CITY CLASSIC and MAKE IT HAPPEN ALL-STARS EXPLANATION OF THE TABLE AND THE ICA PRACTICE LIGHTS The name of each runout is followed by the page on which it can be found in my book, Play Your Best 9 & 10 Ball. The BFS on some of the patterns stands for Big First Shot. These are challenging opening shots that you must often make to kickstart a runout. The shots are meant to be practiced one at a time. The Black Cue Ball runouts feature a Black Cue Ball on the diagram in the book. The Black Cue Ball on ICA’s lighted table includes an arrow that points towards the first ball of the runout. Each runout is rated for its overall difficulty. C is routine, B is above average, and A is super challenging. The numbers of the balls to be played in the run come after its rating. To view the ICA system and to order this module, go to: https://www.icatraining.com/ |
MATCH # - Players - Score - Book Page - BFS - Rating for BCB Runout
#1 – Lee Van Corteza (15) vs. Ralf Souquet (11)
Corteza Makes a Statement! (410 – BFS) C: 6, 7(where it is), 9-A, 10
Balls in the Middle – Diag. A (410) C: 7, 8, 9, 10
Shape After the Combo (412 – BFS) B: 5, 7, 9, 10
One Pocket in 10-Ball - Diag. B (414) C: 5, 7, 8, 9, 10
#2 – Efren Reyes (15) vs. Johnny Archer (11)
4 Balls at a Time! (415) A: 5, 7, 8, 10
The Magician Ply’s his Trade (416 – BFS) C: 6, 7, 8, 9, 10
Efren Threads the Needle (417 – BFS) C: 7, 8, 9, 10
Precision Draw Position (417) A: 7, 8, 9, 10
A 4-Rail Escape (418 – BFS) A: 6, 7, 8, 10
Like a Diamond Cutter! (419) A: 8, 10
Archer Runs to the Bank (419 – BFS) B: 7, 8, 9, 10
#3 – Efren Reyes (15) vs. Brandon Shuff (8)
Efren’s Two-Rail Reverse (420) A: 7, 8, 9, 10
Side Pocket 10 Ball! – Diag. B (422) B: 6, 7, 8, 10
#4 – Shane Van Boening (15) vs. Ralf Souquet (14)
Send in Souquet! (424) A: 7, 8, 9, 10
Set that Angle (425) A: 7, 8, 9, 10
Power Follow and Across (426 – BFS) B: 6, 7, 8, 9, 10
#5 – Francisco Bustamante (15) vs. Rafael Martinez (1)
Off to the Races! (427 – BFS) B: 5, 6, 7, 8, 9, 10
Controlling a Hanger! (427) B: 5, 6, 7, 8, 9, 10
This Judge Gives it a 10!! (428 – BFS) C: 7, 8, 9, 10
A Certified Jaw Dropper!! (429 – BFS) A: 4, 5, 9, 10
#6 – Lee Vann Corteza (15) vs. Stevie Moore (8)
World Class, Part II (430 – BFS) B: 6, 7, 8, 9, 10
That 40 Degree Angle! (431 – BFS) B: 4, 5, 6, 7, 8, 9, 10
Corteza’s Reward – Diagram B (432 – BFS) A+: 4, 5, 6, 7, 8, 10
Two Way Position off a Combo (433 – BFS) C: 6, 8, 9, 10
#7 – Darren Appleton (15) vs. Francisco Bustamante (13)
Going Airborne! – Diagram B (435 – BFS) C: 6, 8, 9, 10
Coming with a Big Shot (436 – BFS) C: 8, 9, 10
Straight Back Power Draw!! (437 – BFS) A: 7, 8, 9, 10
#8 – Rodney Morris (15) vs. Darren Appleton (11)
Pattern Play Genius – Diag. B (439 – BFS) B: 6, 7, 8, 9, 10
Unusual, But Very Effective! (440 – BFS) B: 7, 8, 9, 10
Three Rails in the Side (441 – BFS) A: 4, 5, 6, 7, 10
High Speed Firepower! (441 – BFS) C: 6, 7, 8, 9, 10
#9 – Francisco Bustamante (15) vs. Shane Van Boening (9)
Squeaking in the Widow (443 – BFS) C: 7, 8, 9, 10
Power Hop and Run! (444 – BFS) C: 6, 7, 8, 10
70-Degree Table Length Cut (446 – BFS) C: 6, 7, 8, 9, 10
Inside Spin Power 4-Railer! (447 – BFS) C: 6, 8, 9, 10
Combo Simplifies the Pattern (447) C: 6, 7, 8, 10
#10 – Alex Pagulayan (15) vs. Rodney Morris (9)
Position for a Breakout (448) B: 5, 6, 7, 8, 10
Runout Over Combo (449) B#1: 1-10
B#2: 4, 5, 6, 7, 8, 9, 10
High Octane Recovery Route (449 – BFS) B: 7, 8, 9, 10
#11 – Stevie Moore (15) vs. Alex Pagulayan (12)
Duel “Out Shots” (453 – BFS) B: 6, 7, 8, 9, 10
Fan it in to Win! (454 – BFS) B: 4, 5, 6, 8, 10
Closing the Deal in Style (455 – BFS) A: 6, 8, 9, 10
#12 – Francisco Bustamante (15) vs. John Morra (5)
Rail First at Long Range (456 – BFS) B: 3, 4, 7, 8, 9, 10
Identify the Big Hurdle (458 – BFS) A: 7, 8, 9, 10
#13 – Francisco Bustamante (15) vs. Stevie Moore (5)
Five Rail Position Play (461 – BFS) B: 6, 7, 8, 9, 10
BREAK SHOT PATTERNS
MODULE:
110 CLOSING PATTERNS
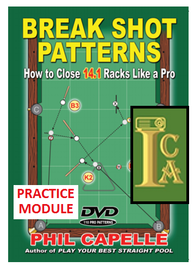
The module includes all 110 closing patterns from my book, Break Shot Patterns. You can quickly set up every pattern, then play the four shots leading up to the break ball. This is perfect for learning to close racks like a pro. The module is intended to be used along with the book and DVD., but you could use it independently as well. The runouts also give you good practice for closing out games of 8-Ball.
To view the ICA system and to order this module, go to: https://www.icatraining.com/
110 CLOSING PATTERNS
The module includes all 110 closing patterns from my book, Break Shot Patterns. You can quickly set up every pattern, then play the four shots leading up to the break ball. This is perfect for learning to close racks like a pro. The module is intended to be used along with the book and DVD., but you could use it independently as well. The runouts also give you good practice for closing out games of 8-Ball.
To view the ICA system and to order this module, go to: https://www.icatraining.com/
Pt. 1 – Key Balls for Side of Rack Break Shots
1 - Close to the Side Rail
1 The Optimum Angle Mike Zuglan 2
2 When to Go Long Pat Fleming 4
3 Get on the Correct Side Efren Reyes 6
4 Key Balls Near the Cushion (TB) Efren Reyes 8
5 Lemons into Lemonade Johnny Archer 10
6 An Up Table K2 Ralf Souquet 12
7 Straight In to Win Charlie Williams 14
2 Far from the Side Rail
8 Options Aplenty Jimmy Fusco 16
9 Trouble in the Middle Mike Zuglan 18
10 Zero Tolerance for Error (TB) Min-Wai Chin 20
11 Position at its Finest Thomas Engert 22
12 Twice into the Rail and Out Mike Sigel 24
13 Surveyor Steve Steve Lipsky 26
3 In the Rack Area
14 The BB/KB Double Play (TB) Mike Sigel 28
15 Working in Close Quarters Steve Mizerak 30
16 Removing a Bad Ball Nick Varner 32
17 Avoiding Contact Jim Rempe 34
18 Beyond the Obvious Johnny Ervolino 36
19 Multiple Options (TB) Johnny Archer 38
20 Touch of a Safecracker John Schmidt 40
21 The Dynamic Duo Danny Harriman 42
22 A Triangle Key Ball Mika Immonen 44
23 Reversing Whitey Mika Immonen 46
4 Below the Rack Area
24 Shoot Easy Long Shots (TB) Jim Rempe 48
25 Precision Soft Spin KB (TB) Jose Garcia 50
26 KBs Below the BB (TB) Min-Wai Chin 52
27 Oliver’s Super Kill Shot Oliver Ortmann 54
5 Misc. Side of Rack Key Balls
28 Nearly Straight in Shot Dallas West 56
29 Rolling the Key Ball Ralf Souquet 58
30 Play them as they Lie Oliver Ortmann 60
31 A Creative Pattern Oliver Ortmann 62
32 Schmidt’s Huge Draw Shot John Schmidt 64
Pt. 2 – More Key Balls for Side of Rack Break Shots
6 Corner – No Rails – Little Movement
33 Shooting Opposite Handed Mike Sigel 66
34 No-Rails Pattern Play Mike Zuglan 68
35 Righthanders vs. Lefties Pat Fleming 70
36 Down the Line to the KB Thorsten Hohmann 72
37 Ball-In-Hand KBs Thorsten Hohmann 74
7 Corner – No Rails – Lots of Movement
38 Eufemia’s Lesson (TB) Jose Garcia 76
39 Assessing the Line Up (TB) Min-Wai Chin 78
40 A Pound/Draw Shot Mike Sigel 80
41 Follow the Road Map (TB) Efren Reyes 82
42 Setting Up the Close (TB) Thorsten Hohmann 84
8 Off the End Rail and Side Rail
43 Choose the Safer Route Mike Sigel 86
44 Wiley’s Short Stroke C.J. Wiley 88
45 Tony’s Inside Spin Tony Robles 90
46 Plan B to the Rescue Jim Rempe 92
47 Player’s Choice Ralf Souquet 94
48 On the Perpendicular John Schmidt 96
49 One Cushion, or Two? Thorsten Hohmann 98
9 Off the End Rail
50 Playing for Two Steve Mizerak 100
51 Super Speed Control (TB) Cicero Murphy 102
52 Take Your Medicine Ralf Souquet 104
10 Into the Far Corner
53 Exceptions Rule! Mike Sigel 106
54 A Successful Operation Allan Hopkins 108
55 Dealing with a Mistake Mike Sigel 110
56 Stop Shot is a Must Thorsten Hohmann 112
57 A Great Up Table Key Ball Johnny Archer 114
58 Manufacturing a Break Ball Thorsten Hohmann 116
59 Long Distance Position Mika Immonen 118
Pt. 3 – Side Pocket Key Balls
11 Side Pocket: Up Table
60 Execution is Everything Steve Mizerak 120
61 Creating a Key Ball (TB) Dallas West 122
62 A Perfect Key Ball Ralf Souquet 124
63 How to Avoid Plan B (TB) Jim Rempe 126
64 Thinking Out of the Box (TB) Jim Rempe 128
65 The Linking Ball (TB) Thorsten Hohmann 130
66 Setting Up an Angle Jose Parica 132
67 A Good Side Rail K2 (TB) Tony Robles 134
68 B4 Sets Up the Run Mika Immonen 136
12 Side Pocket: Low & No Rails
69 Working the Middle Oliver Ortmann 138
70 Mosconi’s Favorite (TB) Dallas West 140
71 A Three Inch Pocket Pat Fleming 142
72 No Rails Necessary (TB) Bill Dunsmore 144
73 Get on the Correct Side (TB) Grady Mathews 146
74 Rempe’s Deep Study Jim Rempe 148
75 Precision Ball Bumping Jim Rempe 150
76 Players Go Two Rails (TB) Efren Reyes 152
77 No Stretch Break Shot Dick Lane 154
78 Short Range Position (TB) Ralf Souquet 156
79 Soft Follow Shots (TB) Jonathon Smith 158
80 Precision Position Play Danny Barouty 160
81 Set in Stone Tony Robles 162
13 Side Pocket: Low & One Rail
82 A Textbook Pattern (TB) Mike Sigel 164
83 Crossing the Line Jim Rempe 166
84 The Little Things are Big (TB) Ralf Souquet 168
85 K2 with a Huge Zone (TB) Thorsten Hohmann 170
86 Three Break Shots! John Schmidt 172
14 Side Pocket: To the End Rail
87 A 9-Ball Position Play Earl Strickland 174
88 A Tendency Error Larry Lisciotti 176
89 Clearing the End Rail Thomas Engert 178
90 Getting Back in Line Dick Lane 180
Pt. 4 – A Variety of Break Balls
15 Behind and Near the Rack
91 A New Break Line Mike Sigel 182
92 The Better Pattern (TB) Johnny Archer 184
93 “Perfect on Everything” Efren Reyes 186
94 Precision Position Efren Reyes 188
95 Reduce the Angle Efren Reyes 190
96 A Short Side Pattern Efren Reyes 192
97 Risk vs. Reward Thorsten Hohmann 194
98 Up Table and Back John Schmidt 196
16 Behind the Rack Near the Rail
99 Playing for a Thin Cut Jim Rempe 198
100 One Tough Run Out Mike Sigel 200
101 A Unique Pattern Ralf Souquet 202
17 Side Pocket Break Shots
102 Sigel’s Great Debate (TB) Mike Sigel 204
103 Connect those Dots (TB) Jim Rempe 206
104 A Change of Plans Efren Reyes 208
105 Go for Ball in Hand John Schmidt 210
106 In the Dead Center Danny Harriman 212
107 A Creative Solution John Schmidt 214
18 Side Rail Break Shots
108 Four on One Rail Steve Mizerak 216
109 Low Side Rail Buster (TB) Johnny Archer 218
110 A Late Cluster Break Mike Sigel 220